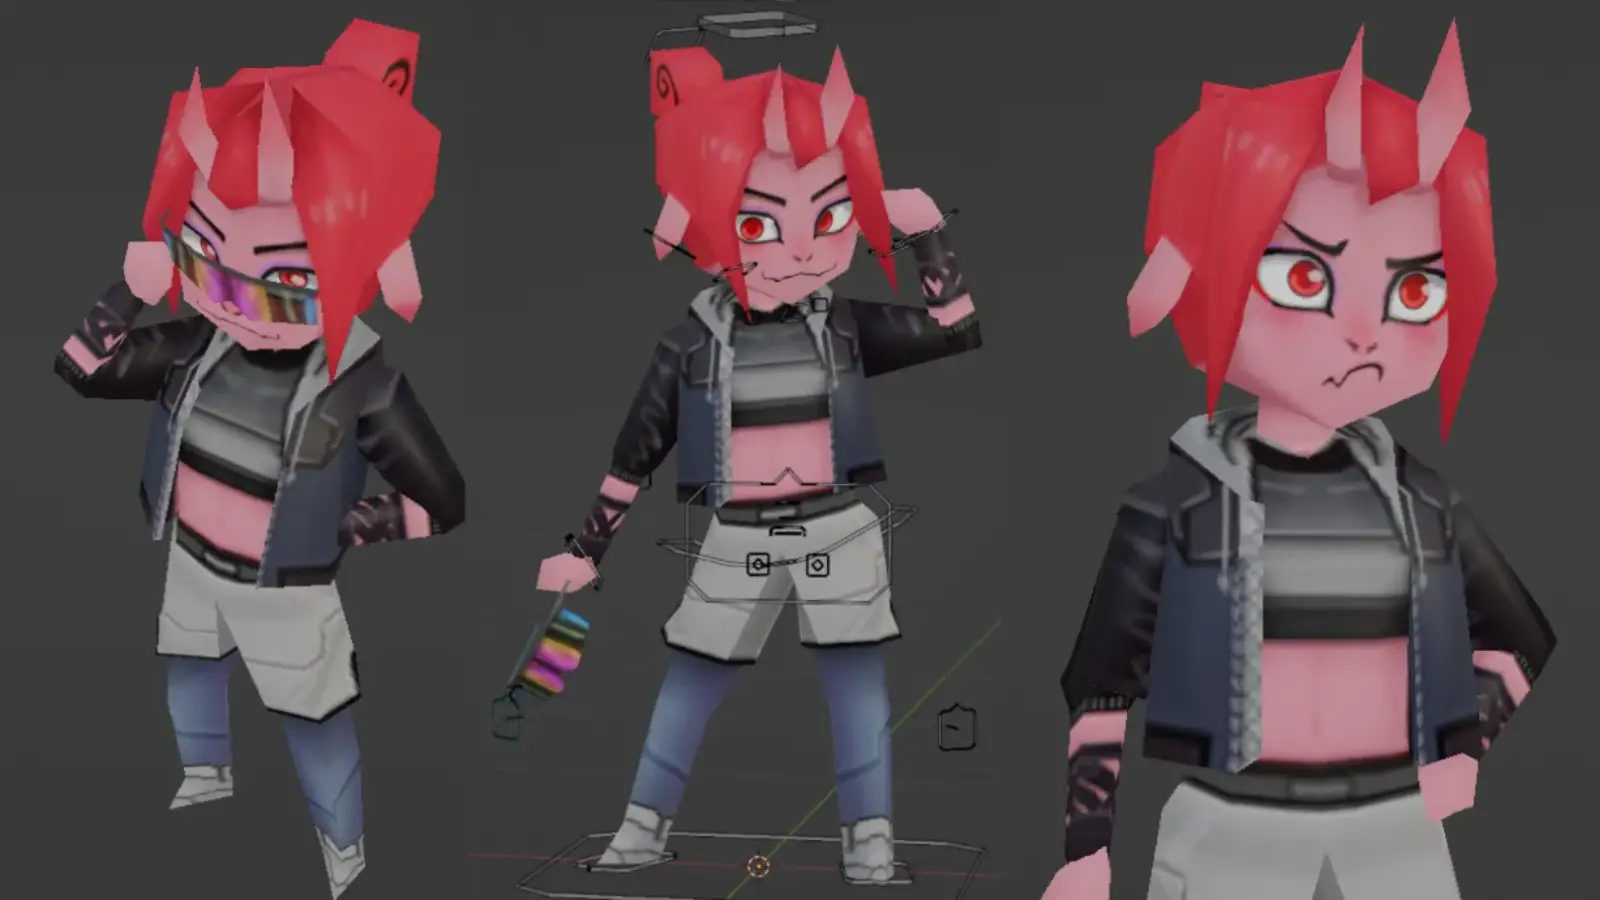
The Core Idea: Sticker Sheets
The main concept is surprisingly simple: I treat the facial features like stickers that I place on top of the character's face.
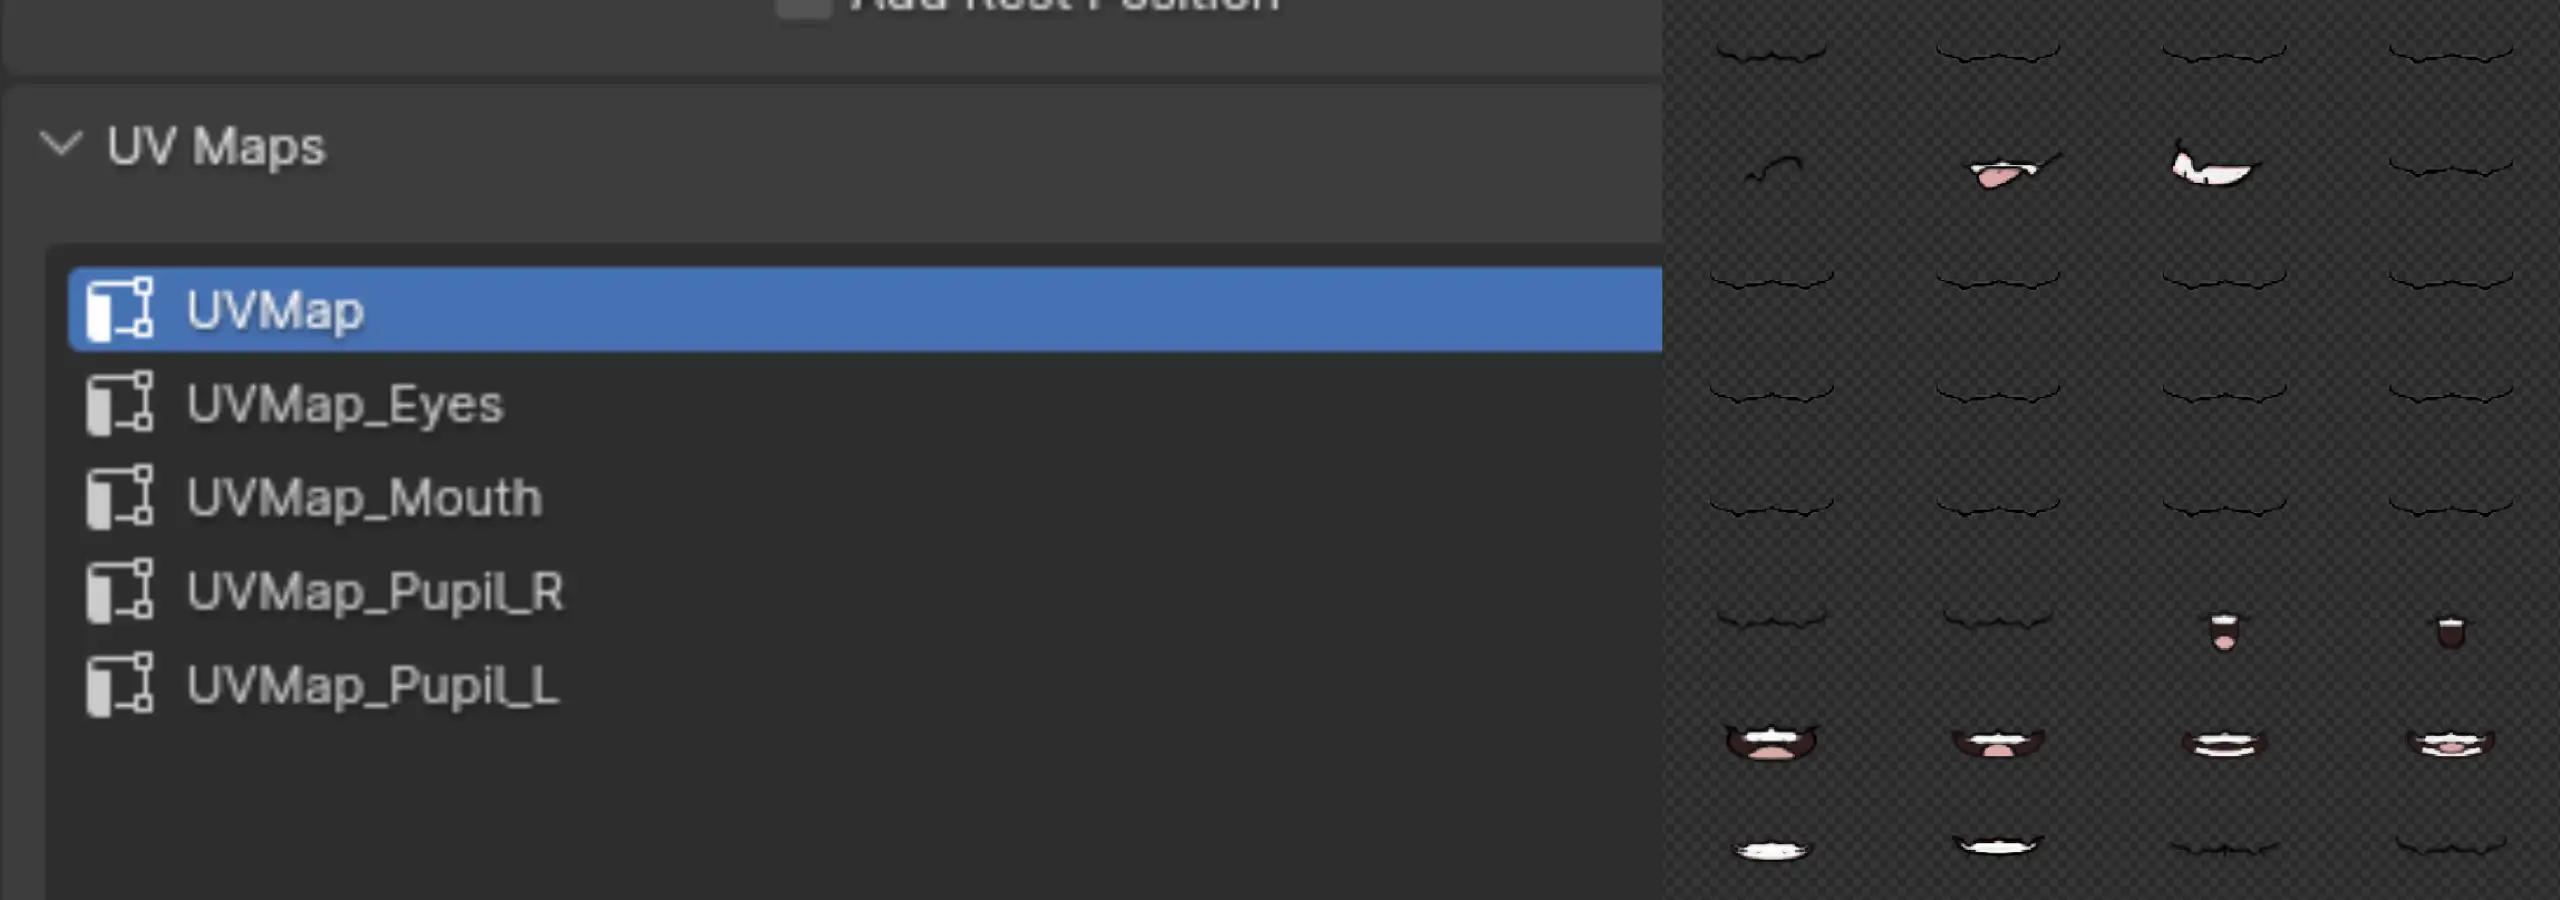
Rather than having one giant texture, I split the face into multiple textures and UV channels. I like to think of each of these textures as sticker sheets, where every expression or facial feature lives in its own little slot.
Bone drivers are then used to "pick" which sticker should be displayed by changing the UV coordinates.
This approach was inspired by the classic look of games like Wind Waker. It lends itself really well to stylized, old-school, and toon-inspired characters while still being flexible enough for modern animation workflows.
Another reason I settled on this system is that I could recreate almost the exact same setup in both Blender and Unreal Engine, making the entire workflow much easier to maintain.
I think of every facial feature as a reusable asset rather than a unique expression. Once you separate eyebrows, eyes, pupils and mouths, you can mix and match them to create many more expressions than you originally drew.
Why Use This Method?
Besides the visual style, there are some practical advantages.
Since all facial textures are loaded upfront, the system "frontloads" the texture memory. For smaller texture sheets, which are common for this kind of old-school aesthetic, this works really well.
It also means the engine doesn't have to stream in new textures while facial animations are playing, helping to avoid loading hitches or visible texture pop-in.
The result is a simple system that's lightweight, predictable and easy to animate.
Breaking the Face Apart
The face is divided into four independent parts:
- 01Eyebrows
- 02Eyes
- 03Pupils
- 04Mouth
Each part has its own texture sheet, and they're blended together primarily through their alpha channels. Keeping everything separate makes it easy to combine different expressions without needing a unique texture for every possible facial pose.
Creating the "Sticker Sheets"
All of the facial textures are drawn by hand.
In my case I used Affinity Photo, but any image editor works just fine. Just use Photoshop, Krita, Clip Studio Paint, or whatever you're comfortable with.
One thing I found incredibly important was organizing the work files. Keeping every facial feature in clearly named folders and sticking to consistent naming conventions makes it much easier to keep track of expressions as the project grows.
Before drawing anything, I also recommend making a list of every expression you think you'll need.
Then... add a few empty slots.
You never know when you'll suddenly need one more angry eyebrow or a slightly more awkward smile halfway through development. (≧∇≦)ノ
Empty slots are cheap. Rebuilding your rig because you ran out of texture space isn't.
The Eyes (⊙o⊙)
The eyes are probably my favorite part of the rig.
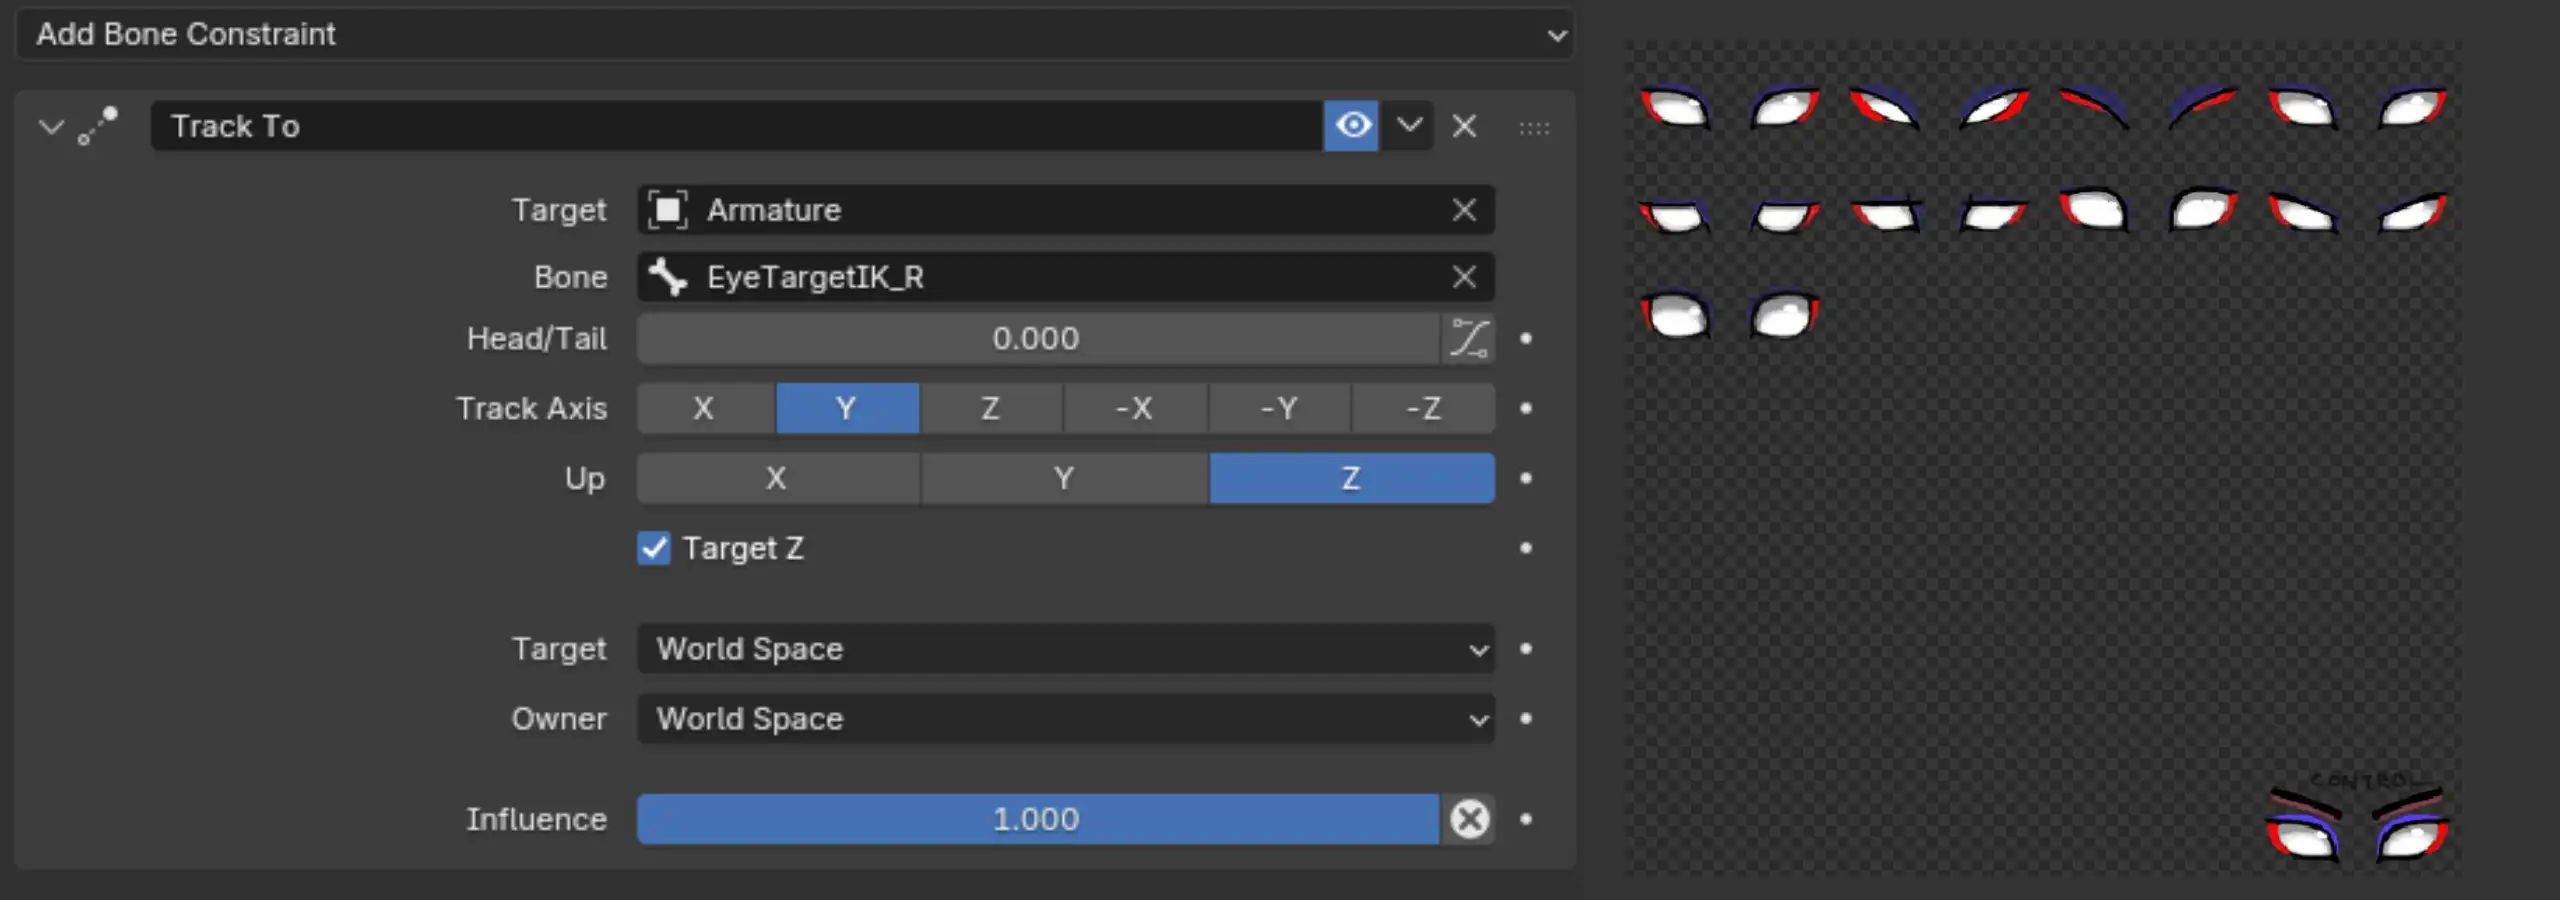
Hidden inside the character's head are a pair of bones that control the pupils by driving their UV offsets. Using actual bones instead of custom controls comes with a nice bonus: all of Blender's Inverse Kinematics (IK) functionality works immediately, and those same controls translate nicely into Unreal Engine.
The pupil bones simply use Blender's "Track To" constraint to look at target bones. The same concept can later be recreated in Unreal Engine using "Look At" nodes inside an Animation Blueprint, allowing the character to naturally follow objects in the world.
Converting the bone movement into UV movement is really just a bit of trigonometry.
...or you can just eyeball it. 🥁
I experimented with limiting the pupil rotations to prevent them from overshooting, but in the end I decided it felt better to simply animate them carefully rather than adding more constraints.
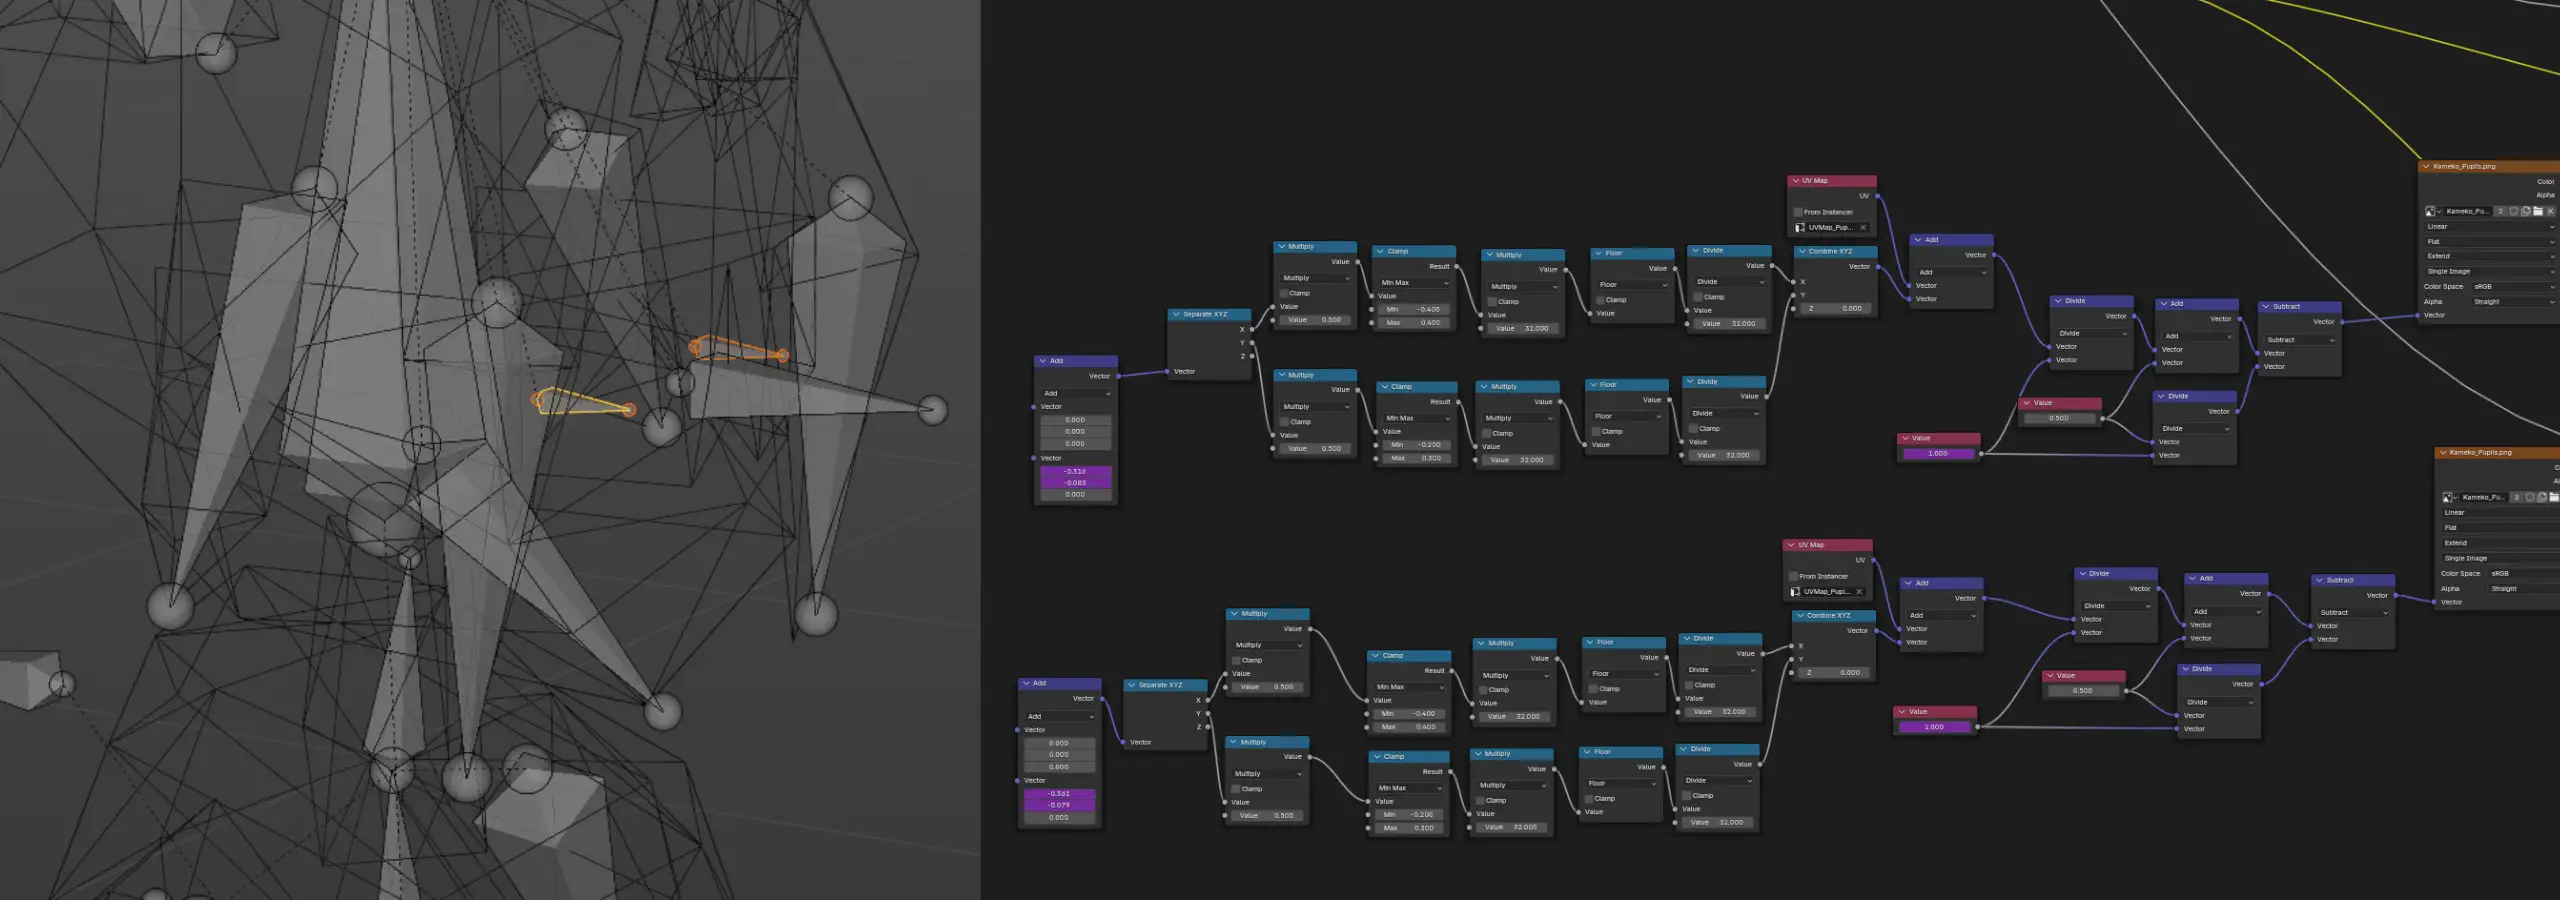
Mapping the Sticker Grid
Each position on the control grid directly corresponds to a position on the texture sheet.
To set this up, I measured the local offsets for each position and connected the bone drivers to the UV offsets.
The only expression-driving bones are the ones moving across this grid. Their movement is limited so they can't accidentally drift too far outside the available expression slots, making them much easier to animate.
Driver Expressions
If you've never worked with Blender drivers before: they're surprisingly straightforward.
You can right-click almost any value (for example, the value of a Value Node) and choose "Add Driver". Drivers can also use simple Python expressions.
One of mine looks like this:
min(3, max(0, var * 33 + 0.5))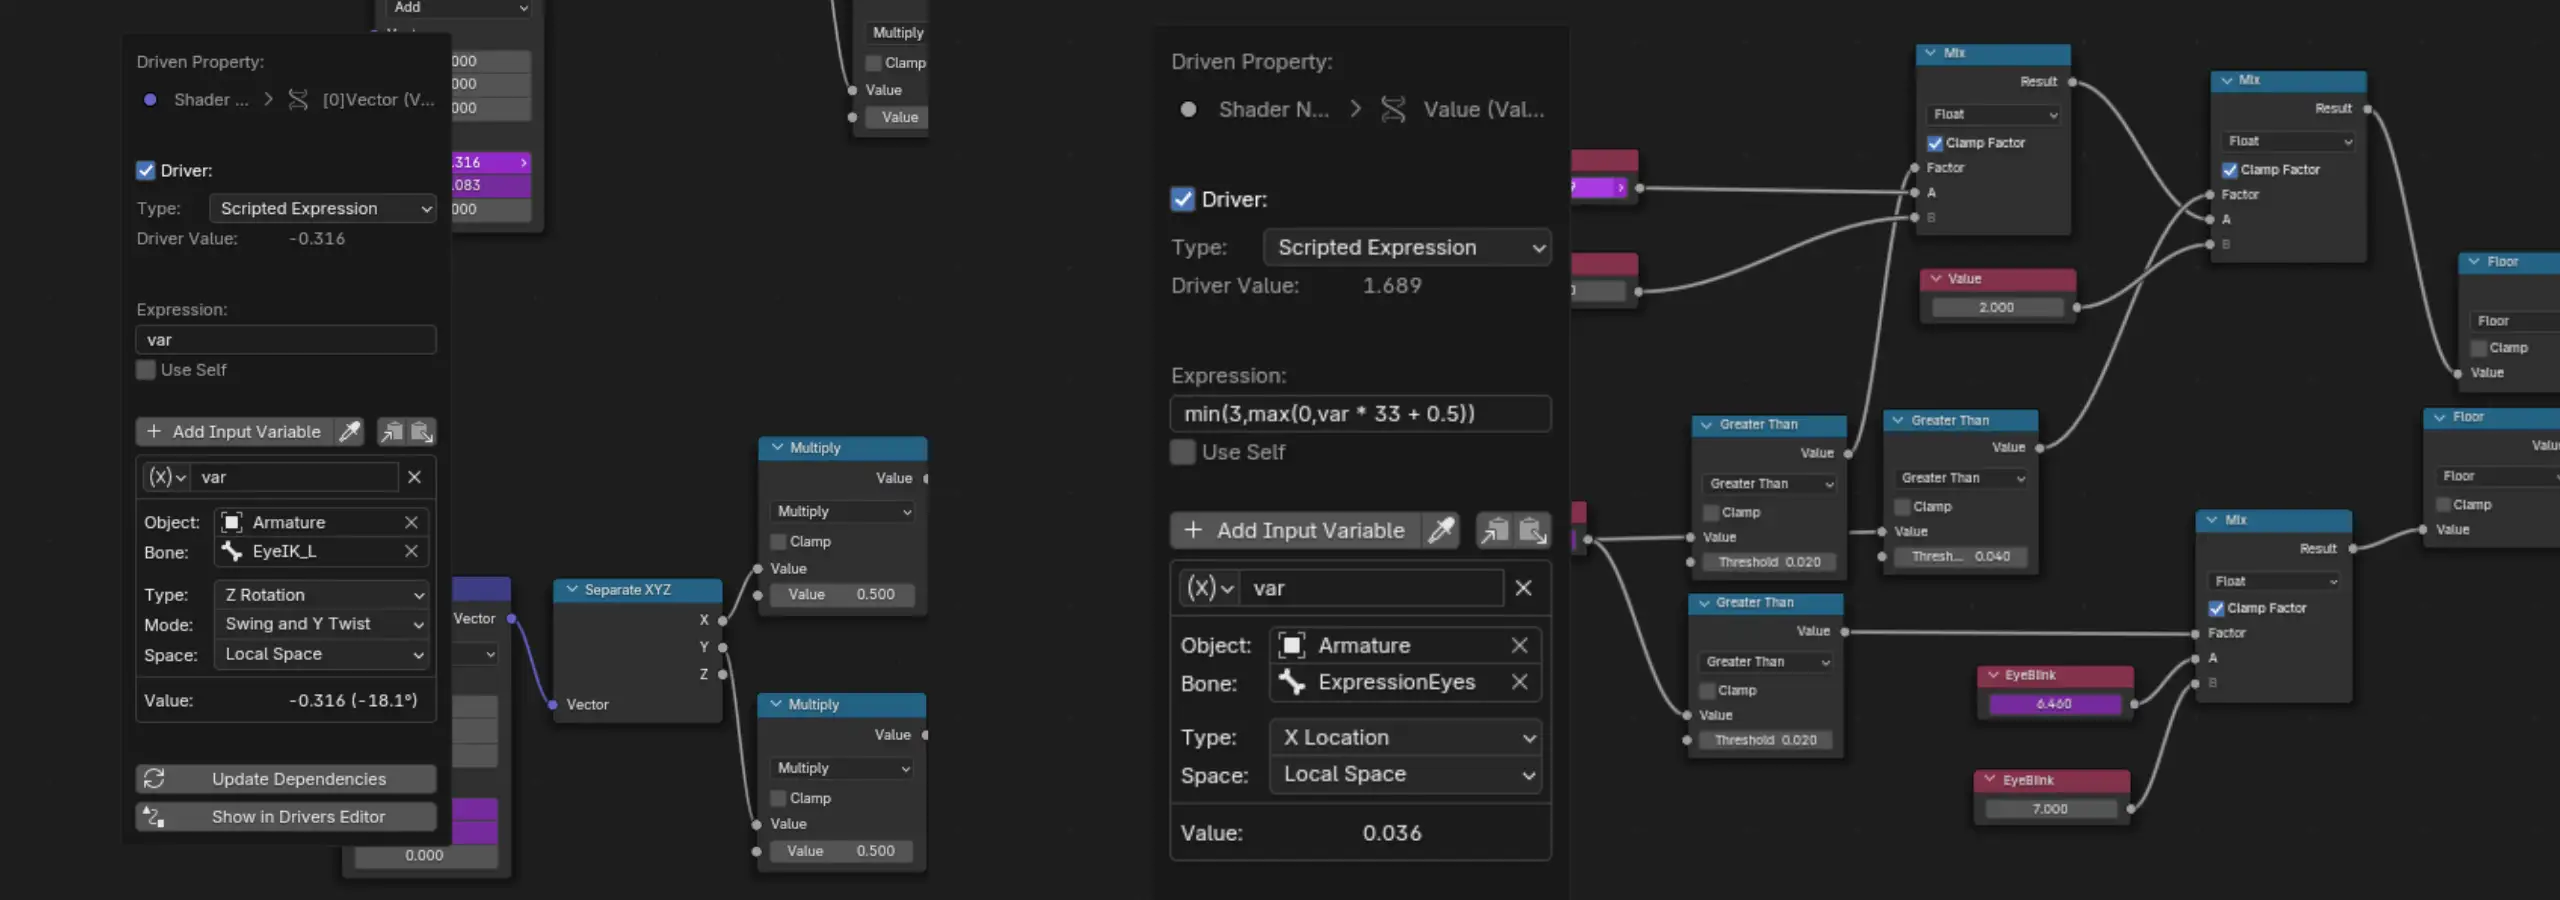
This simply multiplies and clamps the resulting value so it corresponds to a position on the expression grid and stays inside the available range.
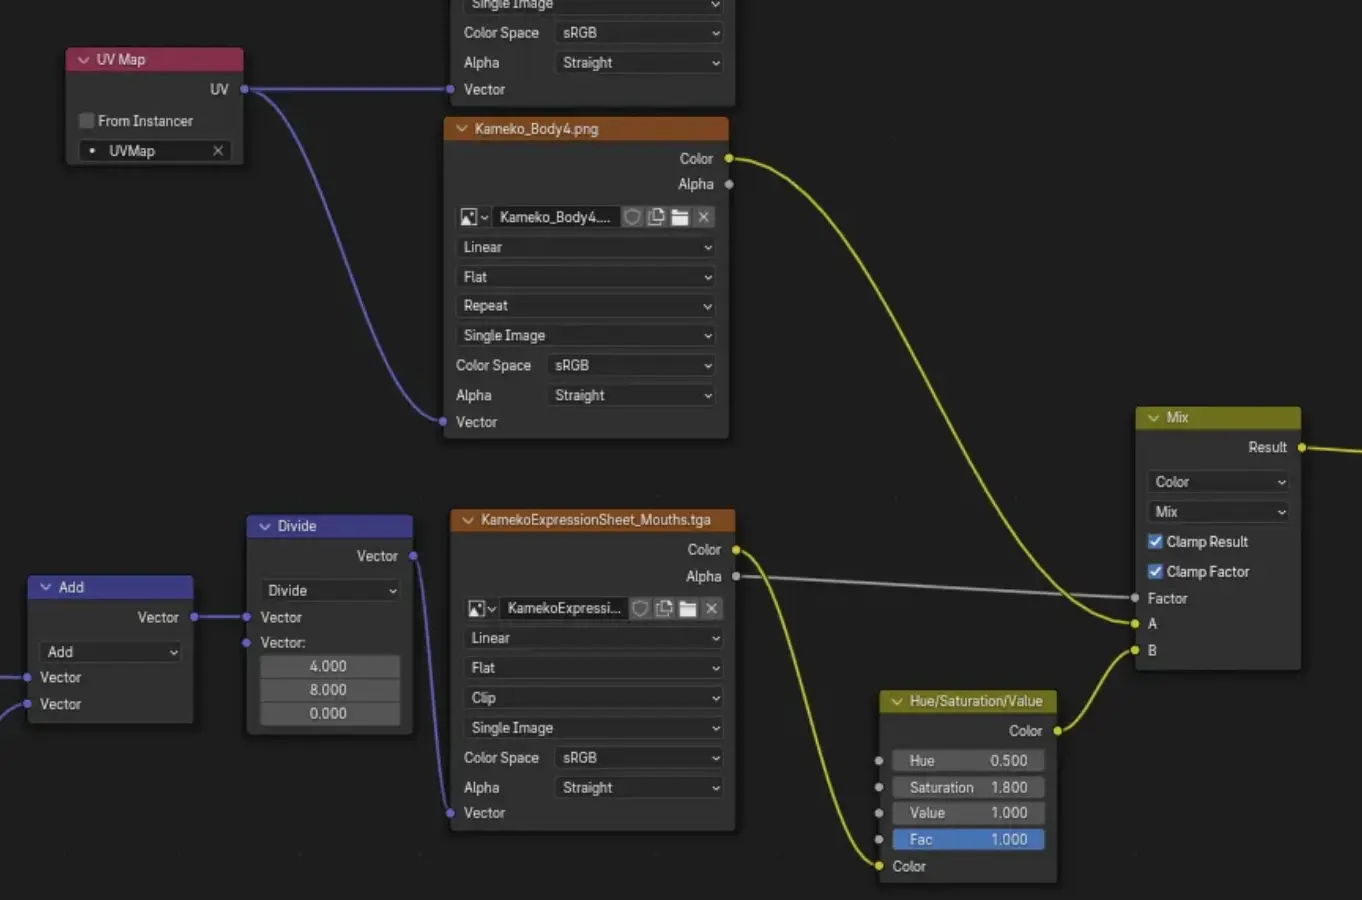
From there, the rest of the work happens inside Blender's material graph, where the UV offsets are translated into the correct texture coordinates.
Limitations
Like every technique, this one has a few trade-offs.
The biggest limitation is texture size. Since all facial textures are loaded upfront, this approach works best with relatively small texture sheets. That's usually perfect for stylized or retro-inspired projects, but it becomes less attractive as texture resolution increases.
As briefly mentioned before, another thing to watch out for is planning your texture sheets.
If you eventually run out of expression slots, expanding them isn't just a matter of making the image larger. You'll likely need to update:
- the Blender rig
- the material setup
- the Animation Blueprint in Unreal Engine
- the texture sheets themselves
Leaving yourself a few spare slots from the beginning can save a surprising amount of work later on.
Future Improvements
Like most tools, this rig is still evolving.
Some things I'd like to experiment with in the future are:
- automated blinking and eye behaviour
- simplifying parts of the setup to make it easier to reuse between characters
I'm sure there are also plenty of improvements I haven't thought of yet—and that's half the fun.
Final Thoughts
That's pretty much the whole idea!
The system is fairly straightforward once everything is in place, but it gives me a lot of flexibility when posing expressions while keeping the rig intuitive to animate.
Most importantly, it captures the stylized look I was aiming for while fitting neatly into both my Blender and Unreal Engine workflow.
If this inspires you to build something similar or even improve upon it, I would love to see your results!
Happy rigging! ♪(^∇^*)